Michael Maslowski's Portfolio
A7 - Unit Blocks (Part 2)
This is a 3D model for CGT 116 assignment 03. The assignment was to create 6 advanced wooden blocks and texture them using UV maps. I used multiple different modeling techniques for each block which I go into more detail below.
Advanced Unit Blocks
Arch Block
This block started as a 7 x 3.5 x 3.5 cube. I used the multi-cut tool to bisect the cube horizontally from the middle. I then created a cylinder with a radius of 1.75 and 16 subdivisions. I positioned this cylinder in the center of the cube and used the multi-cut tool to replicate the shape of the cylinder. I then deleted the cylinder, the face enveloped by the cylinder, and all the faces of the cube apart from the one I used the multi-tool on. I then mirrored the face, extracted the face, and then extruded it back to the original shape. I reversed the mesh normals, chamfered the edges by a factor of .25 with 2 segments, and smoothed the display.
Swoop Block
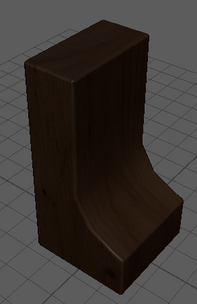
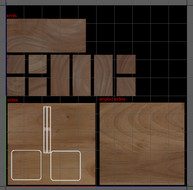
This block started as a 7 x 3.5 x 3.5 cube. I took the cube cut reduced its width by half. I then used the multi-cut tool to create a face near the bottom. I extruded this face to get the extended part of the swoop block. I then chamfered the edge between the newly extruded portion and block. After adjusting the vertices, I used the multi-cut tool to create quadrilaterals within the mesh to make UV unwrapping easier. After the shape was ready, I chamfered all the sides by a fraction of .25 with 2 segments and smoothed the mesh display.
Slope Block
This block started as a 7 x 3.5 x 3.5 cube. I chamfered one corner of the block by a fraction of .8 with 3 segments. I then removed the front and back faces of the block. I created a cylinder with 8 subdivisions to act as my hole reference. I aligned the cylinder with the position of the hole, reversed the mesh normals, and then I removed the front and back faces of the cylinder. I combined the cylinder with the mesh and starting bridging between the edges of each component. After everything was bridged, I chamfered the edges by a fraction of .25 and smoothed the edges.
Custom Unit Blocks
Gate Block
This block started as a 7 x 3.5 x 3.5 cube. I created a cylinder with a radius of 1.00 and 8 subdivisions. I took this cylinder and transformed it into the shape of the gate. I then used the multi-cut tool to create edges on the cube in the shape of the gate. I then deleted the front and back faces that were in the shape of the gate's hole. I bridged together the missing faces of the gate and used a multi-cut tool to create the quadrilaterals of the mesh. I chamfered all the edges by a fraction of .25 with 2 segments, and then smoothed the edges.
Wood Character
This block was modeled after a cookie cutter figure. I started by creating the foot of the figure with a cube. I chamfered the edges of the block to create the round ends of the shoe, and then I extruded upwards to create the leg. Once I reached the waist portion of the character, I duplicated the leg to the other side. I then created the torso of the character by extruding faces upwards. Once the torso was complete, I created the hand. I used a cube as the start and chamfered two of the corners to give it a rounded shape. I then extruded the face opposite of the corners to create the arm. I mirrored the arm after it was complete. I then created the head using a cylinder to match the size of the head. To connect the head to the torso. I removed the cylinder faces overlapping with the neck and bridged the remaining edges together. I then took the edge of the bridge and target welded it to the top of the torso. To connect the arms, I removed the faces between the arms and torso, and then target welded them together. After the initial shape was complete, I used a multi-cut tool to clean up the quadrilaterals of the mesh. I then chamfered the edges by a factor of .25 with 2 segments and smoothed the edges.
Flat Block
This wooden block was a 7 x 7 x 1 cube that has beveled corners to make them round. I also beveled the edges by a factor of .25 with 2 segments and smoothed the edges.
Cone Block
This wooden block is a cone with a radius of 1.75 and height of 3.5. I chamfered its bottom edges by a factor of .25 with 2 segments and smoothed the edges.


